Docker - Nextcloud
You can find prebuilt images Here
- Minimal Install
- Install with Collabora Code
- Install with Memories
- Install with Memories & Office
Nextcloud Installation using Docker Compose
This method includes Redis and MariaDB
First lets update your system.
sudo apt-get update && apt-get upgrade -y
Setting up the directories
Now lets setup the Directories
You can change the directories to your liking.
sudo mkdir /var/docker && sudo mkdir /var/docker/nextcloud
Lets take ownership of the directory
sudo chown -R 1000:1000 /var/docker
Creating .env files
Now lets make two Docker Secrets files in the new directory.
cd /var/docker/nextcloud
nano .mariadb.env
Paste this using CTRL+SHIFT+V
MYSQL_ROOT_PASSWORD=CHANGEME
MYSQL_PASSWORD=CHANGEME
MYSQL_DATABASE=nextcloud
MYSQL_USER=nextcloud
Please Change CHANGEME to a password of your choosing.
Refrain from using Special characters for you MySQL Passwords.
Ex. ‘ ~ ! @ # $ % ^ & * ( ) _ - + = { } [ ] / < > , . ; ? ' : | (space)
Save the new file by pressing CTRL+X
Now lets make the second file.
nano .nextcloud.env
Paste the Following
NEXTCLOUD_TRUSTED_DOMAINS=cloud.<YourDomain>.com
TRUSTED_PROXIES=<IP address of your Reverse Proxy>
OVERWRITEPROTOCOL=https
OVERWRITECLIURL=https://cloud.<YourDomain>.com
REDIS_HOST=redis
REDIS_PORT=6379
PHP_MEMORY_LIMIT=512M
PHP_UPLOAD_LIMIT-100M
MYSQL_PASSWORD=CHANGEME
MYSQL_DATABASE=nextcloud
MYSQL_USER=nextcloud
MYSQL_HOST=mariadb
Please Change the Domain and Reverse Proxy IP.
Please make sure that the Password is the same as the one you previously set in the last file
Remove all instances of <>
Creating the Compose file
Now lets create the compose file.
nano docker-compose.yaml
Paste this into the file
name: nextcloud

services:
  mariadb:
    image: mariadb:10.6
    container_name: mariadb
    restart: always
    command: --transaction-isolation=READ-COMMITTED --log-bin=binlog --binlog-format=ROW
    volumes:
      - ./mariadb:/var/lib/mysql
    env_file:
      - .mariadb.env

  nextcloud:
    image: nextcloud:production
    container_name: nextcloud
    restart: always
    ports:
      - 8080:80
    links:
      - mariadb
      - redis
    volumes:
      - ./nextcloud:/var/www/html
    env_file:
      - .nextcloud.env

  redis:
    container_name: redis
    image: redis:latest
    expose:
      - 6379
    command: redis-server --save 60 1 --loglevel warning
    restart: always

  watchtower:
    container_name: watchtower
    image: containrrr/watchtower
    volumes:
      - /var/run/docker.sock:/var/run/docker.sock
Starting Nextcloud
Now lets start it up.
sudo docker compose up -d
the -d flag stands for detatched mode.
After its done pulling the docker images you can open up a web browser.
Before proceeding, you will need to configure your reverse proxy. I have an example Nginx config Here.
Connect to nextcloud by typing in your configured domain
You should see this screen.
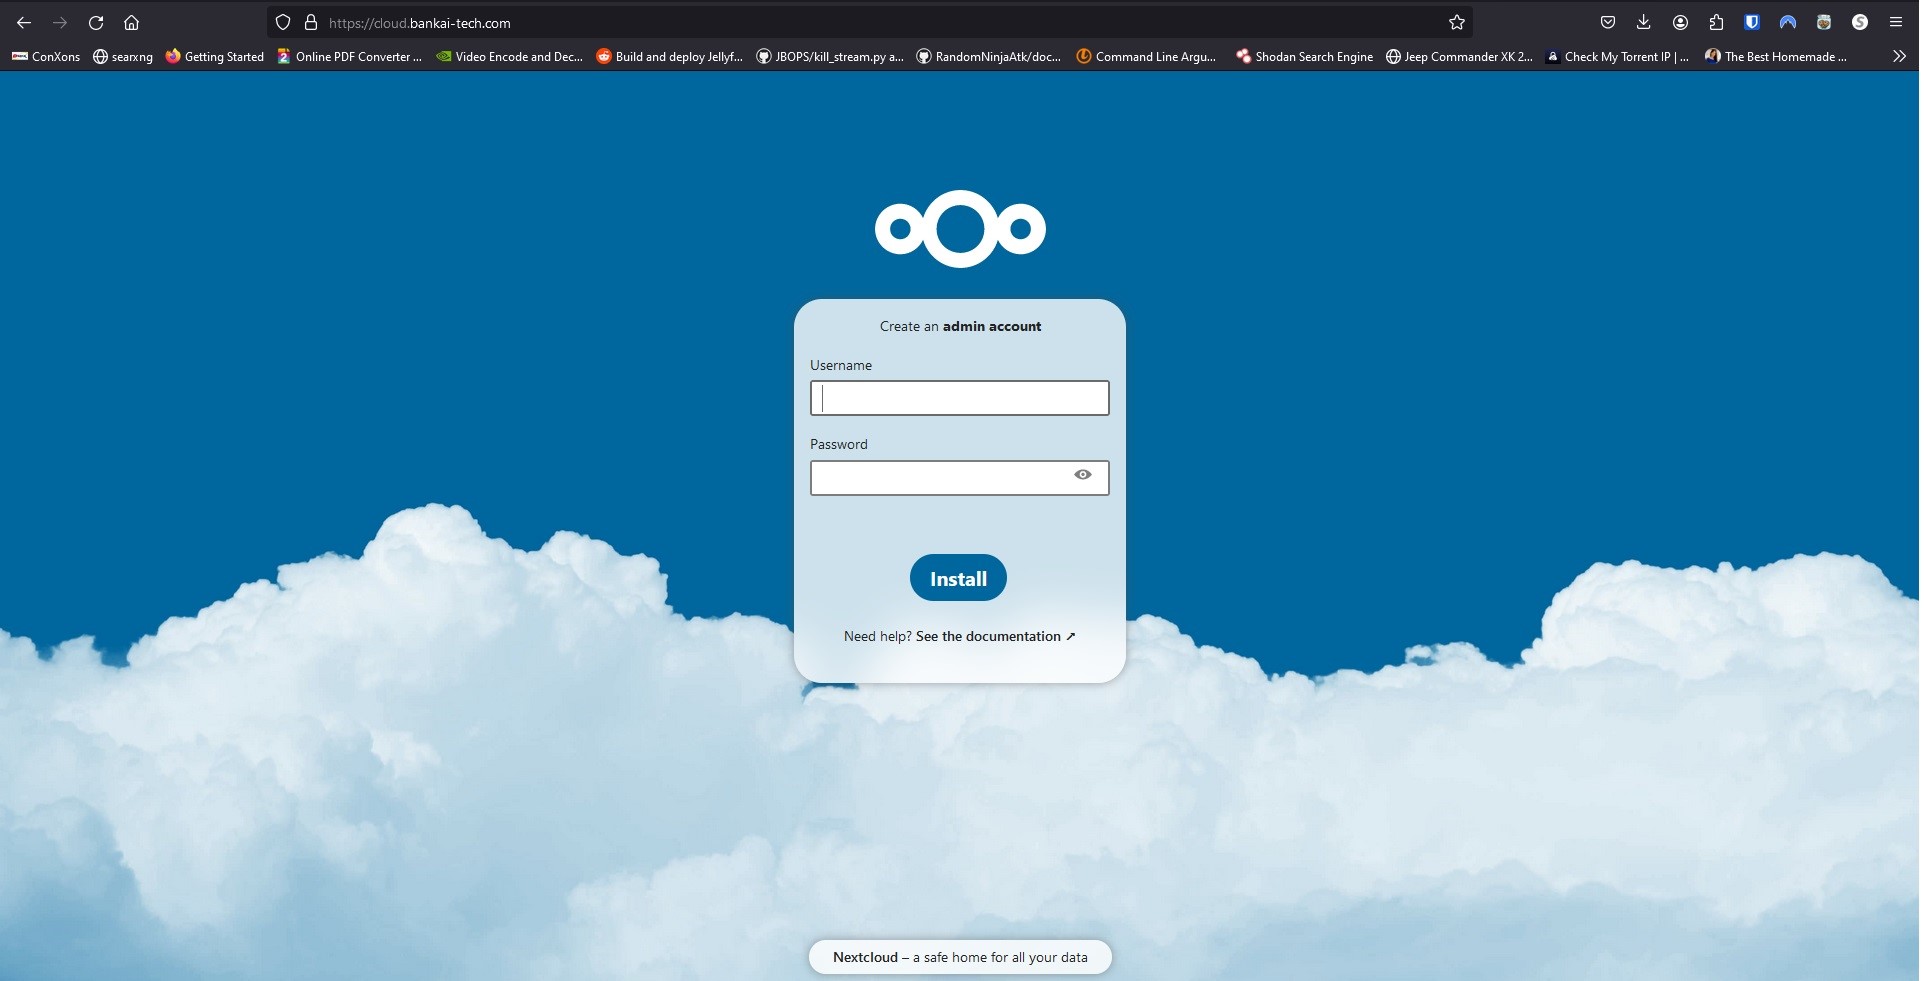
Account Creation
Now create an admin account and click Install
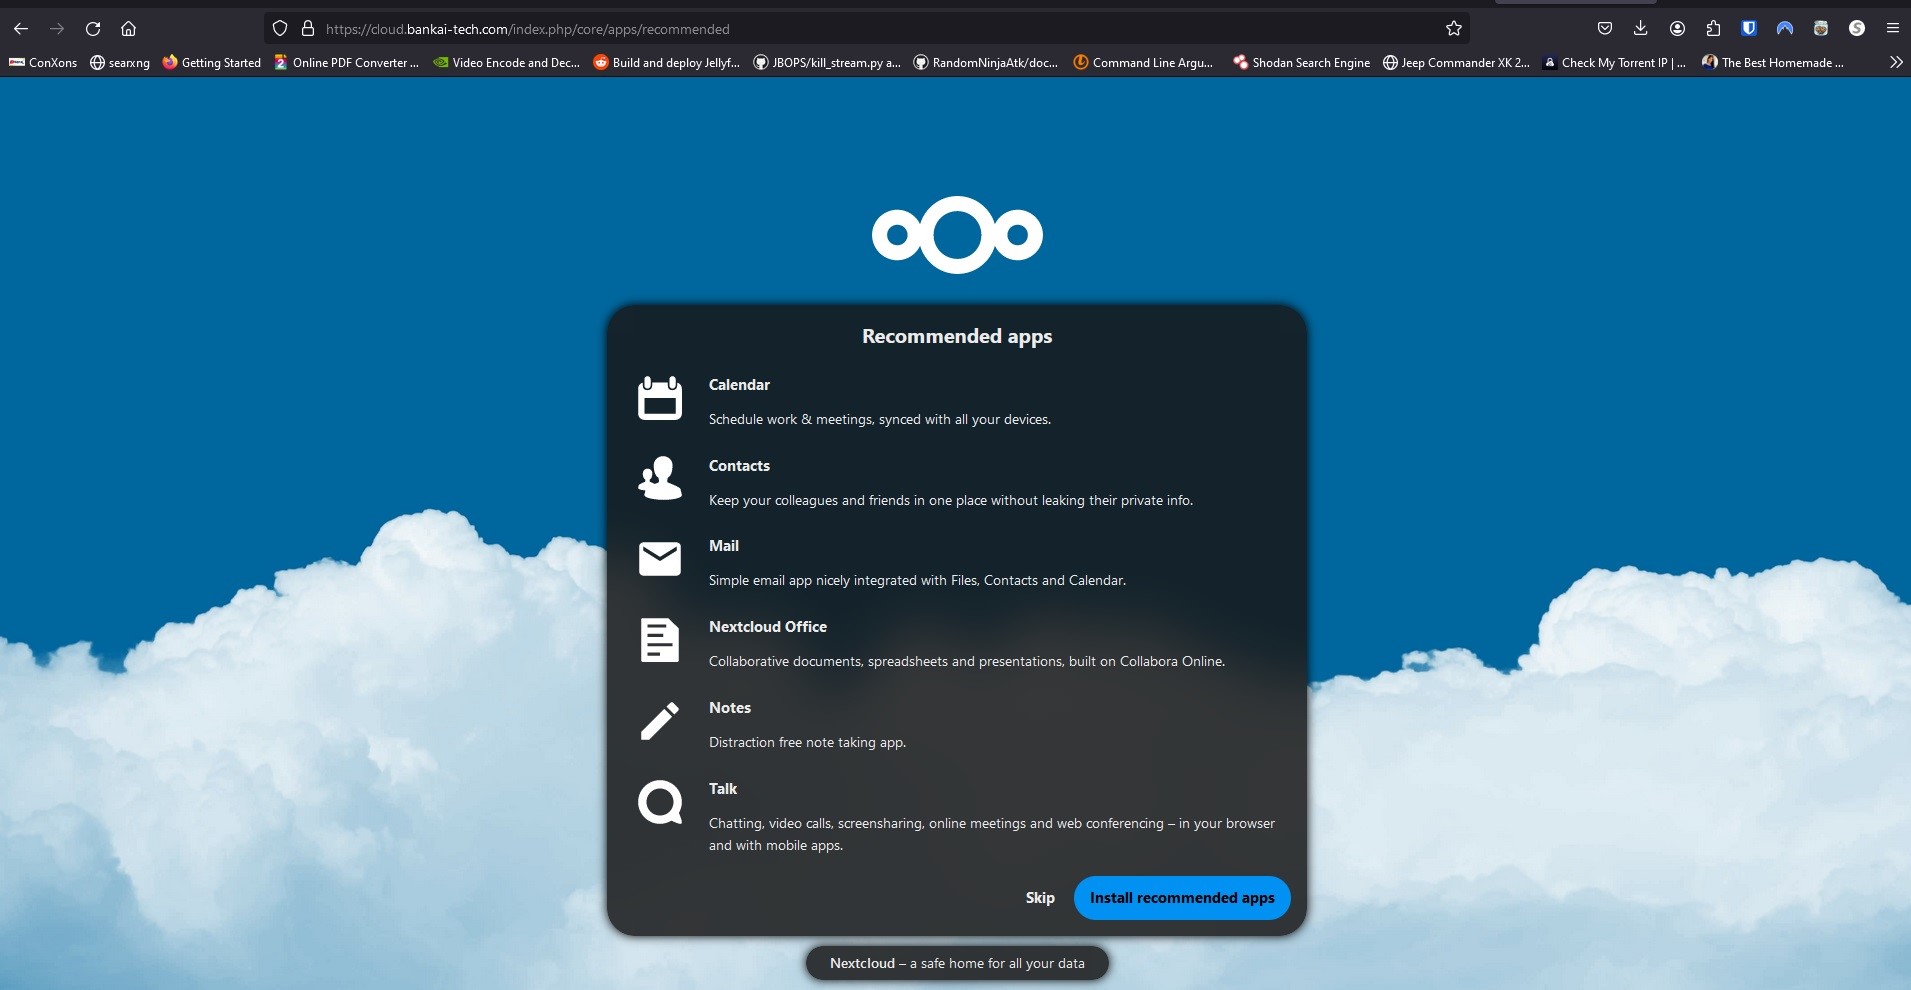
Click Install Recommended Apps
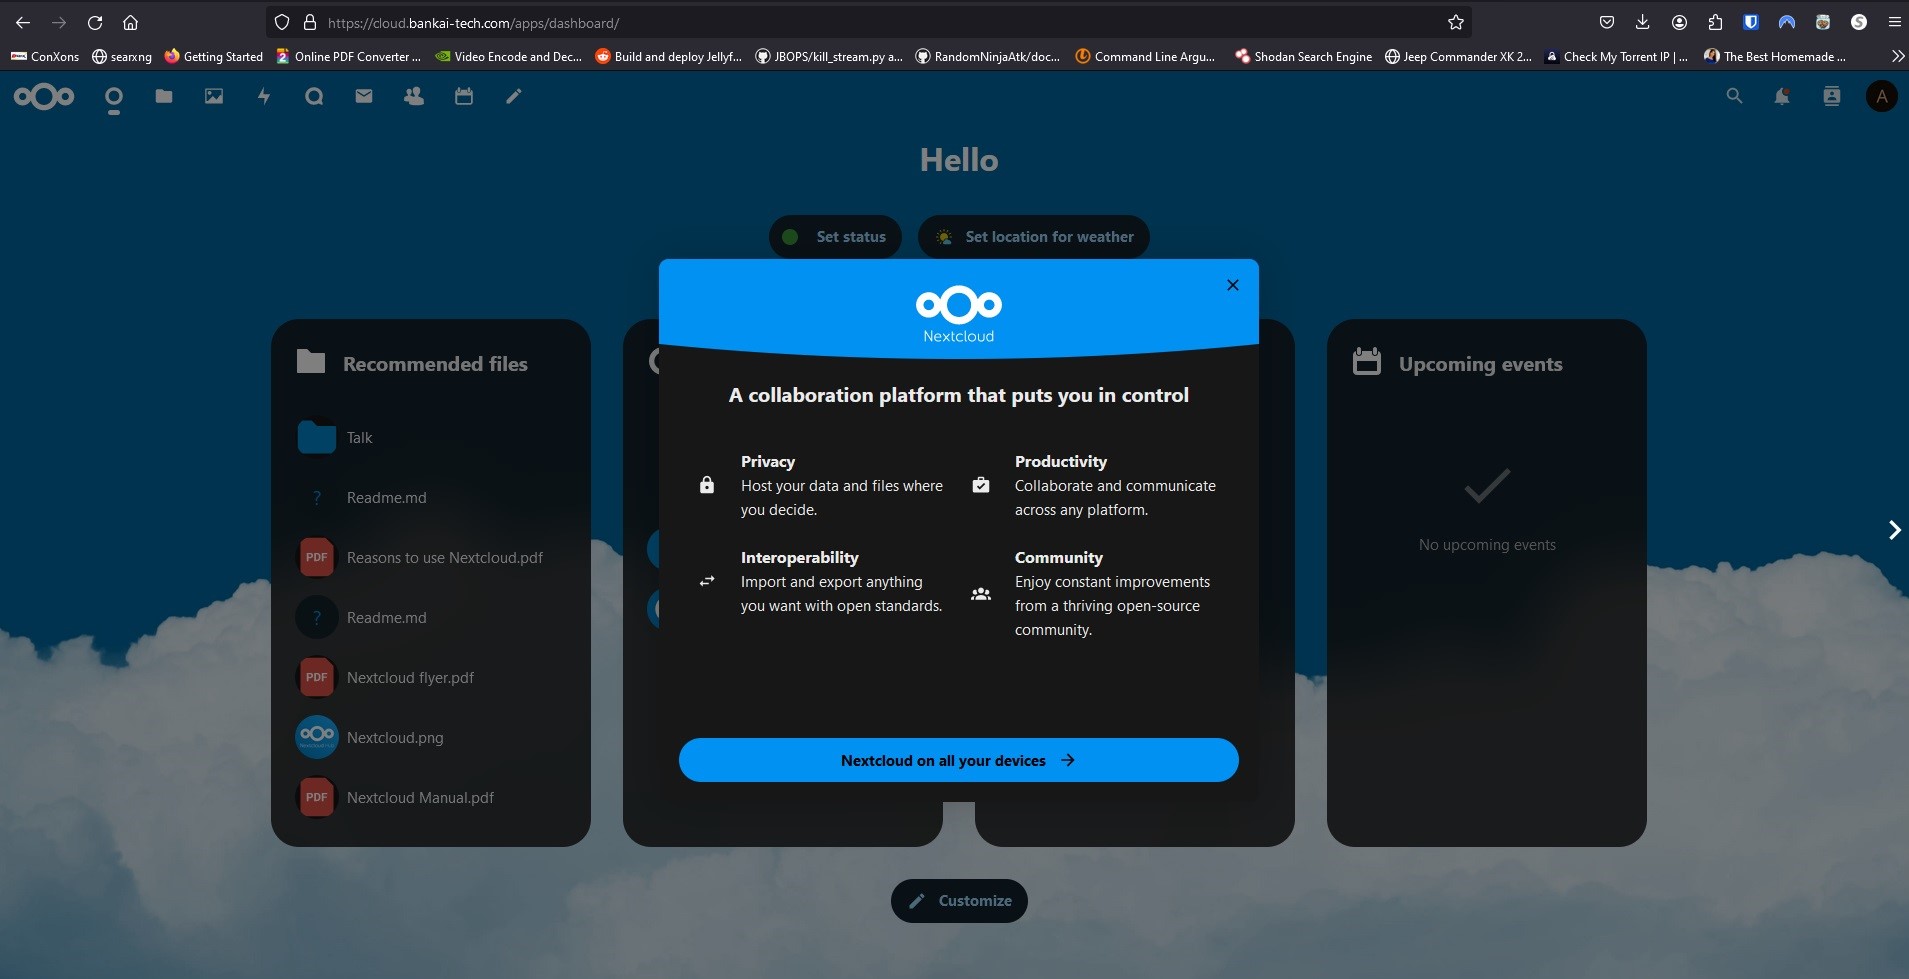
When its done installing you should see your Dashboard
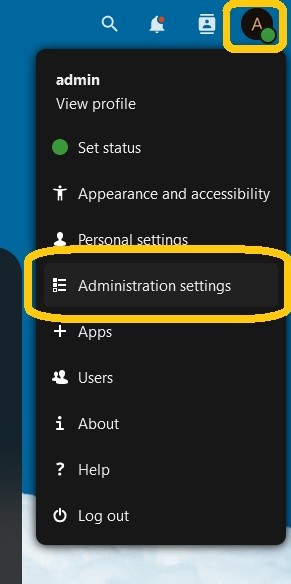
Checking for errors and warnings
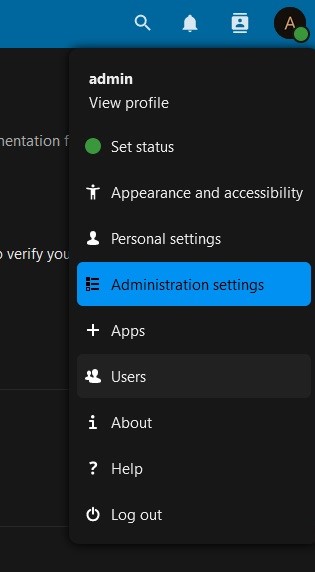
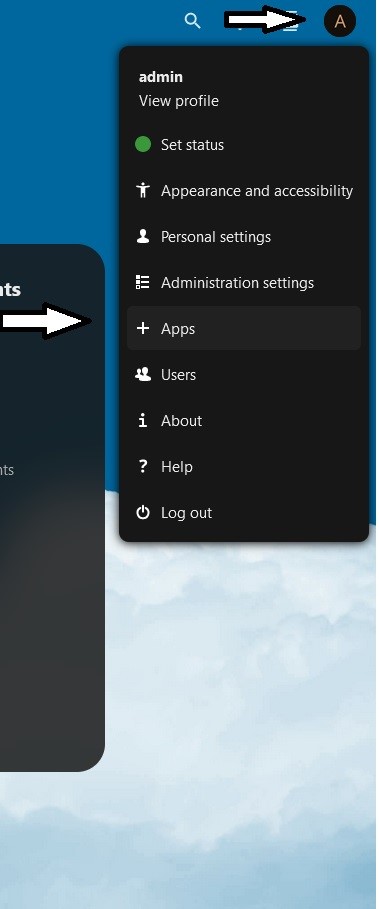
On the top right click the User Icon and go to Administration Settings
Here you should see Security & Setup Warnings
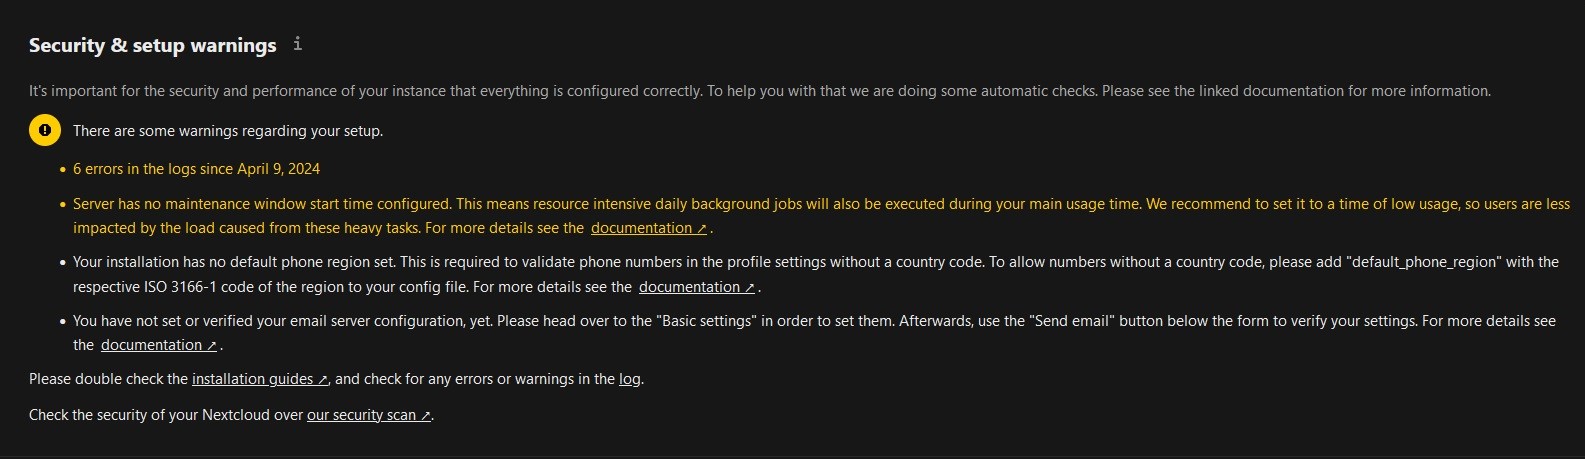
In order to fix the Maintenance Window and the Phone Region warnings, we will have to edit our config.php file.
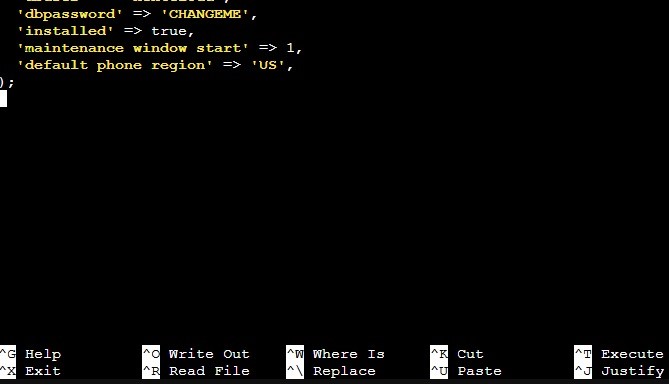
Modifying the config.php file
Run the following command to open the config.php file with nano.
nano nextcloud/config/config.php
If you recieved an error Directory nextcloud doesnt exist, then you need to change directories.
cd /var/docker/nextcloud then try again.Now add the following to the bottom of the file.
  'maintenance_window_start' => 1,
  'default_phone_region' => 'US',
Now if you go back to your Administration Settings Page.
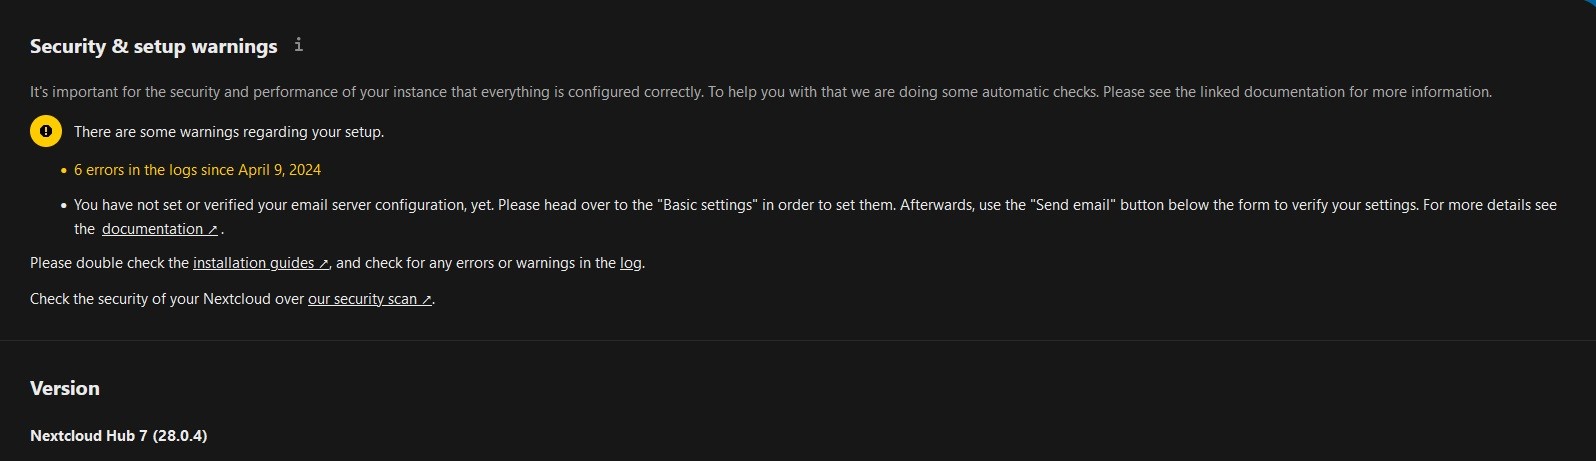
In some cases, you may have to delete your browser cache and restart the browser for the Warnings to update.
Creating production use user
Now you can go create a user for yourself.
Go to the user icon on the top right and select Users.
Click on Add User on the left hand side.
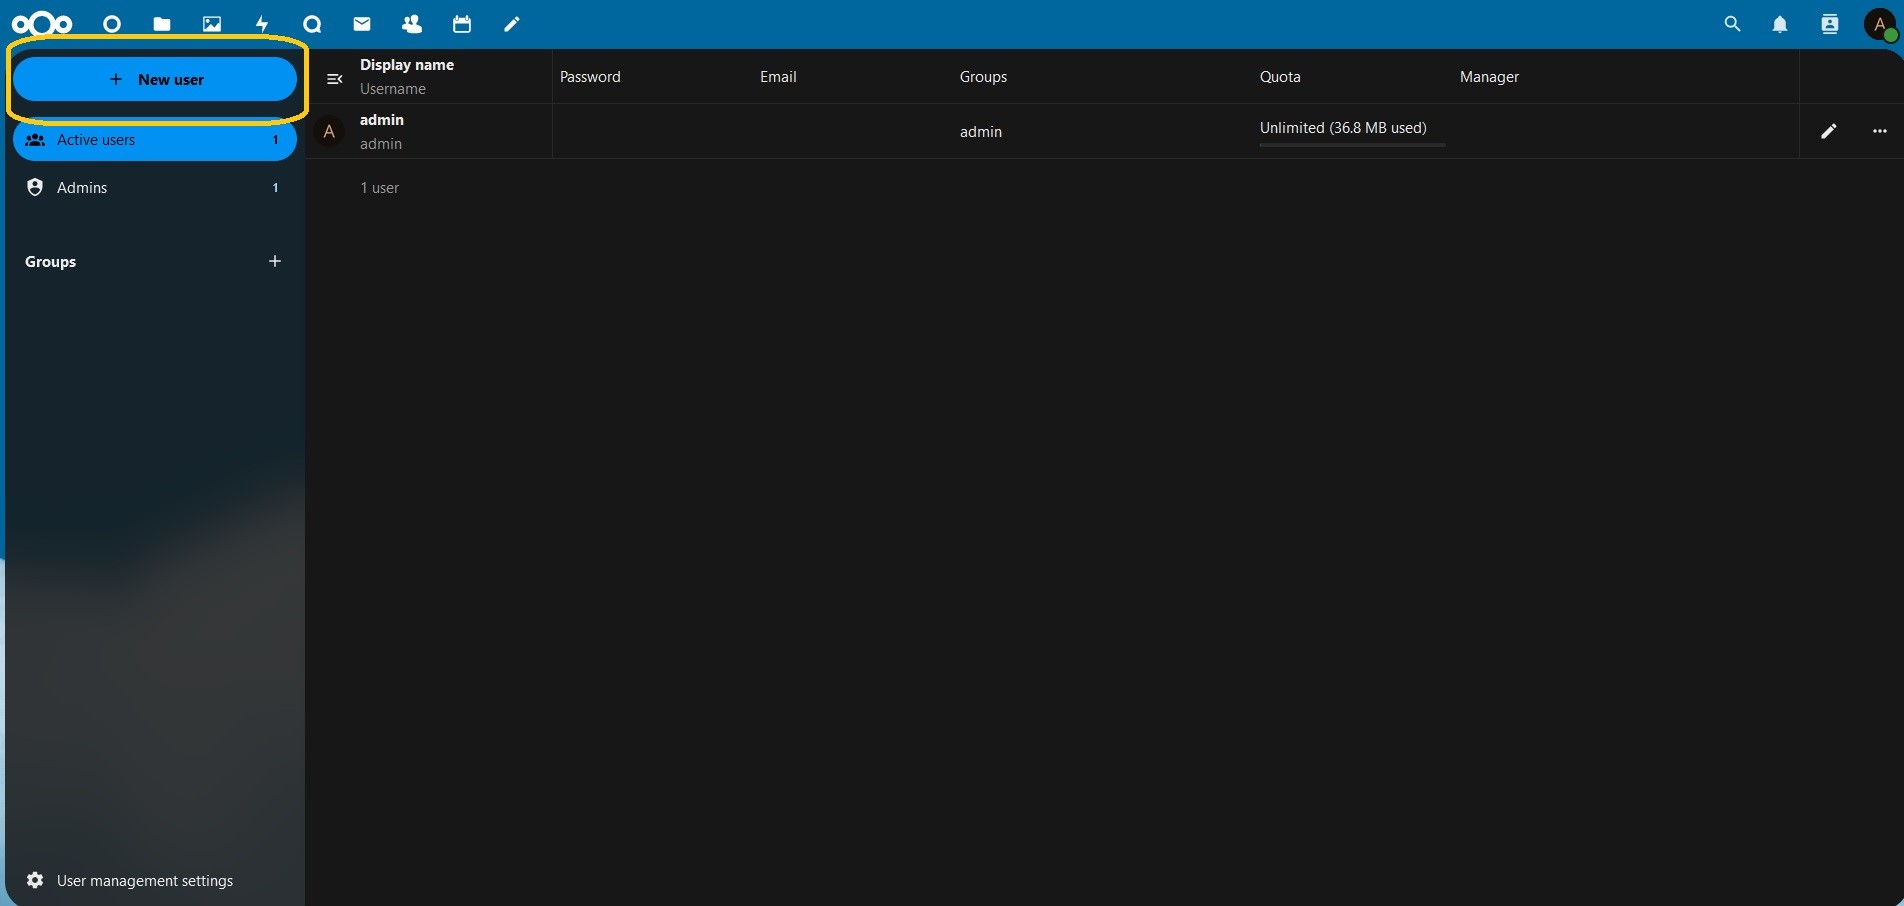
Now create your User.
Make sure to set Groups to admin

Congragulations!! you have installed Nextcloud!
Nextcloud Installation With Collabora Code
This method includes Redis, MariaDB, and Collabora Code
First lets update your system.
sudo apt-get update && apt-get upgrade -y
Setting up the directories
Now lets setup the Directories
You can change the directories to your liking.
sudo mkdir /var/docker && sudo mkdir /var/docker/nextcloud
Lets take ownership of the directory
sudo chown -R 1000:1000 /var/docker
Creating .env files
Now lets make two Docker Secrets files in the new directory.
cd /var/docker/nextcloud
nano .mariadb.env
Paste this using CTRL+SHIFT+V
MYSQL_ROOT_PASSWORD=CHANGEME
MYSQL_PASSWORD=CHANGEME
MYSQL_DATABASE=nextcloud
MYSQL_USER=nextcloud
Please Change CHANGEME to a password of your choosing.
Refrain from using Special characters for you MySQL Passwords.
Ex. ‘ ~ ! @ # $ % ^ & * ( ) _ - + = { } [ ] / < > , . ; ? ' : | (space)
Save the new file by pressing CTRL+X
Now lets make the second file.
nano .nextcloud.env
Paste the Following
NEXTCLOUD_TRUSTED_DOMAINS=cloud.<YourDomain>.com
TRUSTED_PROXIES=<IP address of your Reverse Proxy>
OVERWRITEPROTOCOL=https
OVERWRITECLIURL=https://cloud.<YourDomain>.com
REDIS_HOST=redis
REDIS_PORT=6379
PHP_MEMORY_LIMIT=512M
PHP_UPLOAD_LIMIT-100M
MYSQL_PASSWORD=CHANGEME
MYSQL_DATABASE=nextcloud
MYSQL_USER=nextcloud
MYSQL_HOST=mariadb
Please Change the Domain and Reverse Proxy IP.
Please make sure that the Password is the same as the one you previously set in the last file
Remove all instances of <>
Now lets make the third file.
nano .collabora.env
Paste the following
username=admin
password=PASSWORD
domain=cloud\\.domain\\.com
Creating the Compose file
Now lets create the compose file.
nano docker-compose.yaml
Paste this into the file
version: '3.8'

services:
  mariadb:
    image: mariadb:10.6
    container_name: mariadb
    restart: always
    command: --transaction-isolation=READ-COMMITTED --log-bin=binlog --binlog-format=ROW
    volumes:
      - ./mariadb:/var/lib/mysql
    env_file:
      - .mariadb.env

  nextcloud:
    image: nextcloud:production
    container_name: nextcloud
    restart: always
    ports:
      - 8080:80
    links:
      - mariadb
      - redis
      - collabora
    volumes:
      - ./nextcloud:/var/www/html
    env_file:
      - .nextcloud.env

  redis:
    container_name: redis
    image: redis:latest
    expose:
      - 6379
    command: redis-server --save 60 1 --loglevel warning
    restart: always

  collabora:
    container_name: collabora
    hostname: collabora
    privileged: true
    tty: true
    ports:
      - 9980:9980
    cap_add:
      - MKNOD
    image: collabora/code:latest
    env_file:
      - .collabora.env
    restart: always

  watchtower:
    container_name: watchtower
    image: containrrr/watchtower
    volumes:
      - /var/run/docker.sock:/var/run/docker.sock
Starting Nextcloud
Now lets start it up.
sudo docker compose up -d
the -d flag stands for detatched mode.
[+] Running 4/4
 ✔ Container mariadb    Running                                                                                                                            0.0s
 ✔ Container redis      Running                                                                                                                            0.0s
 ✔ Container collabora  Started                                                                                                                            1.3s
 ✔ Container nextcloud  Started
After its done pulling the docker images you can open up a web browser.
Before proceeding, you will need to configure your reverse proxy. I have an example Nginx config Here.
Connect to nextcloud by typing in your configured domain
You should see this screen.
Account Creation
Now create an admin account and click Install
Click Install Recommended Apps
When its done installing you should see your Dashboard
Checking for errors and warnings
On the top right click the User Icon and go to Administration Settings
Here you should see Security & Setup Warnings
In order to fix the Maintenance Window and the Phone Region warnings, we will have to edit our config.php file.
Modifying the config.php file
Run the following command to open the config.php file with nano.
nano nextcloud/config/config.php
If you recieved an error Directory nextcloud doesnt exist, then you need to change directories.
cd /var/docker/nextcloud then try again.Now add the following to the bottom of the file.
  'maintenance_window_start' => 1,
  'default_phone_region' => 'US',
Now if you go back to your Administration Settings Page.
In some cases, you may have to delete your browser cache and restart the browser for the Warnings to update.
Creating production use user
Now you can go create a user for yourself.
Go to the user icon on the top right and select Users.
Click on Add User on the left hand side.
Now create your User.
Make sure to set Groups to admin
Setting up Nextcloud Office (Collabora Code)
Head back over to your Administration Settings and scroll down on the left until you see Nextcloud Office
Wait a few seconds while it processes.
Now choose Use your own Server

Enter in your domain that you will use for office and Uncheck Disable certificate verification
You will have to add an A record for office and setup your reverse proxy for Collabra
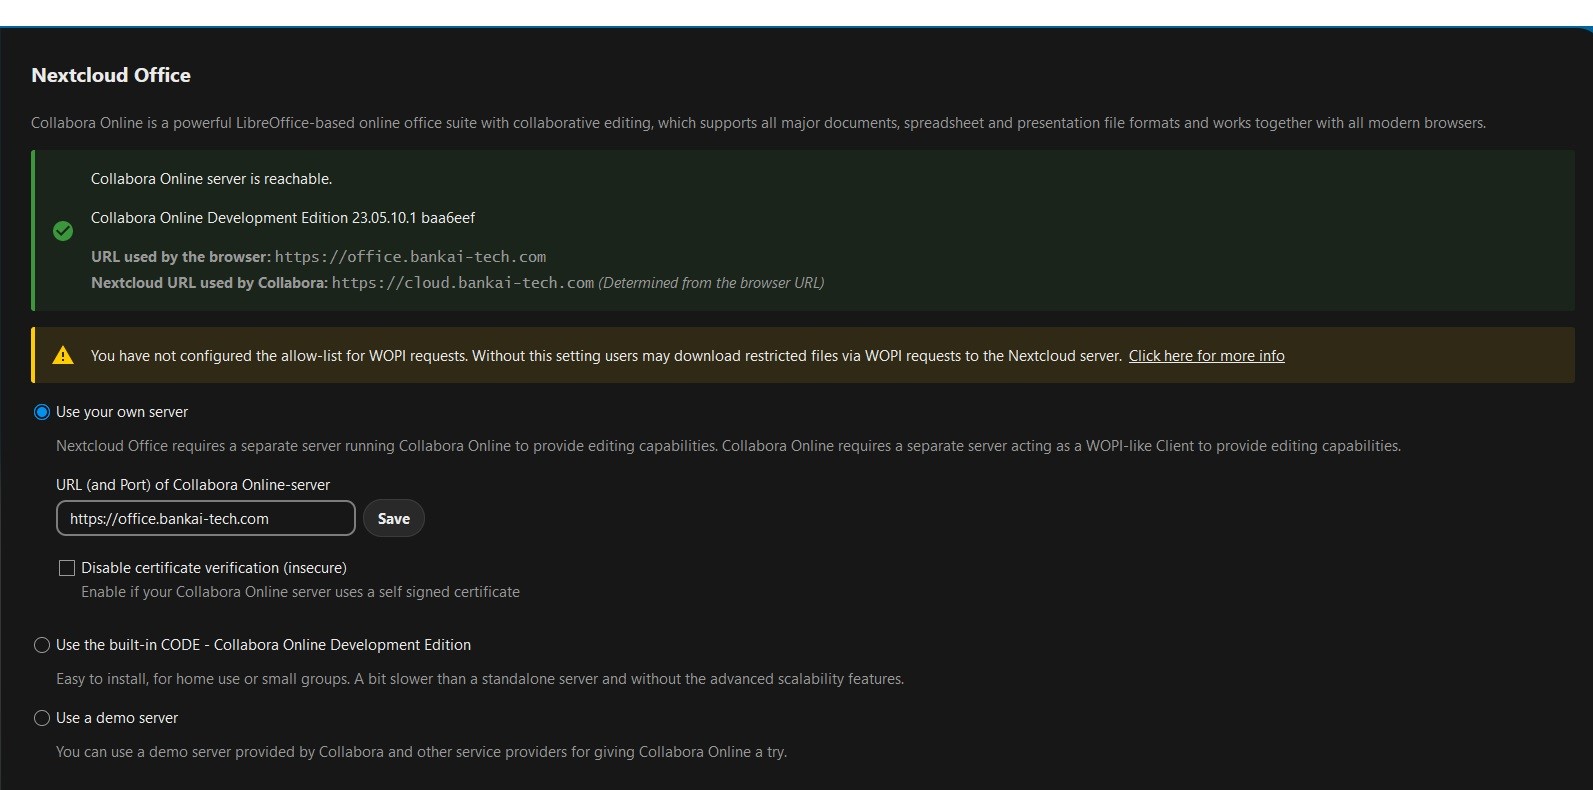
WOPI List
Now scroll down to the WOPI List
Public IP, Network CIDR, and 127.0.0.1Ex. 251.163.184.3,192.168.1.1/24,1270.0.1
 Press
Press ENTER
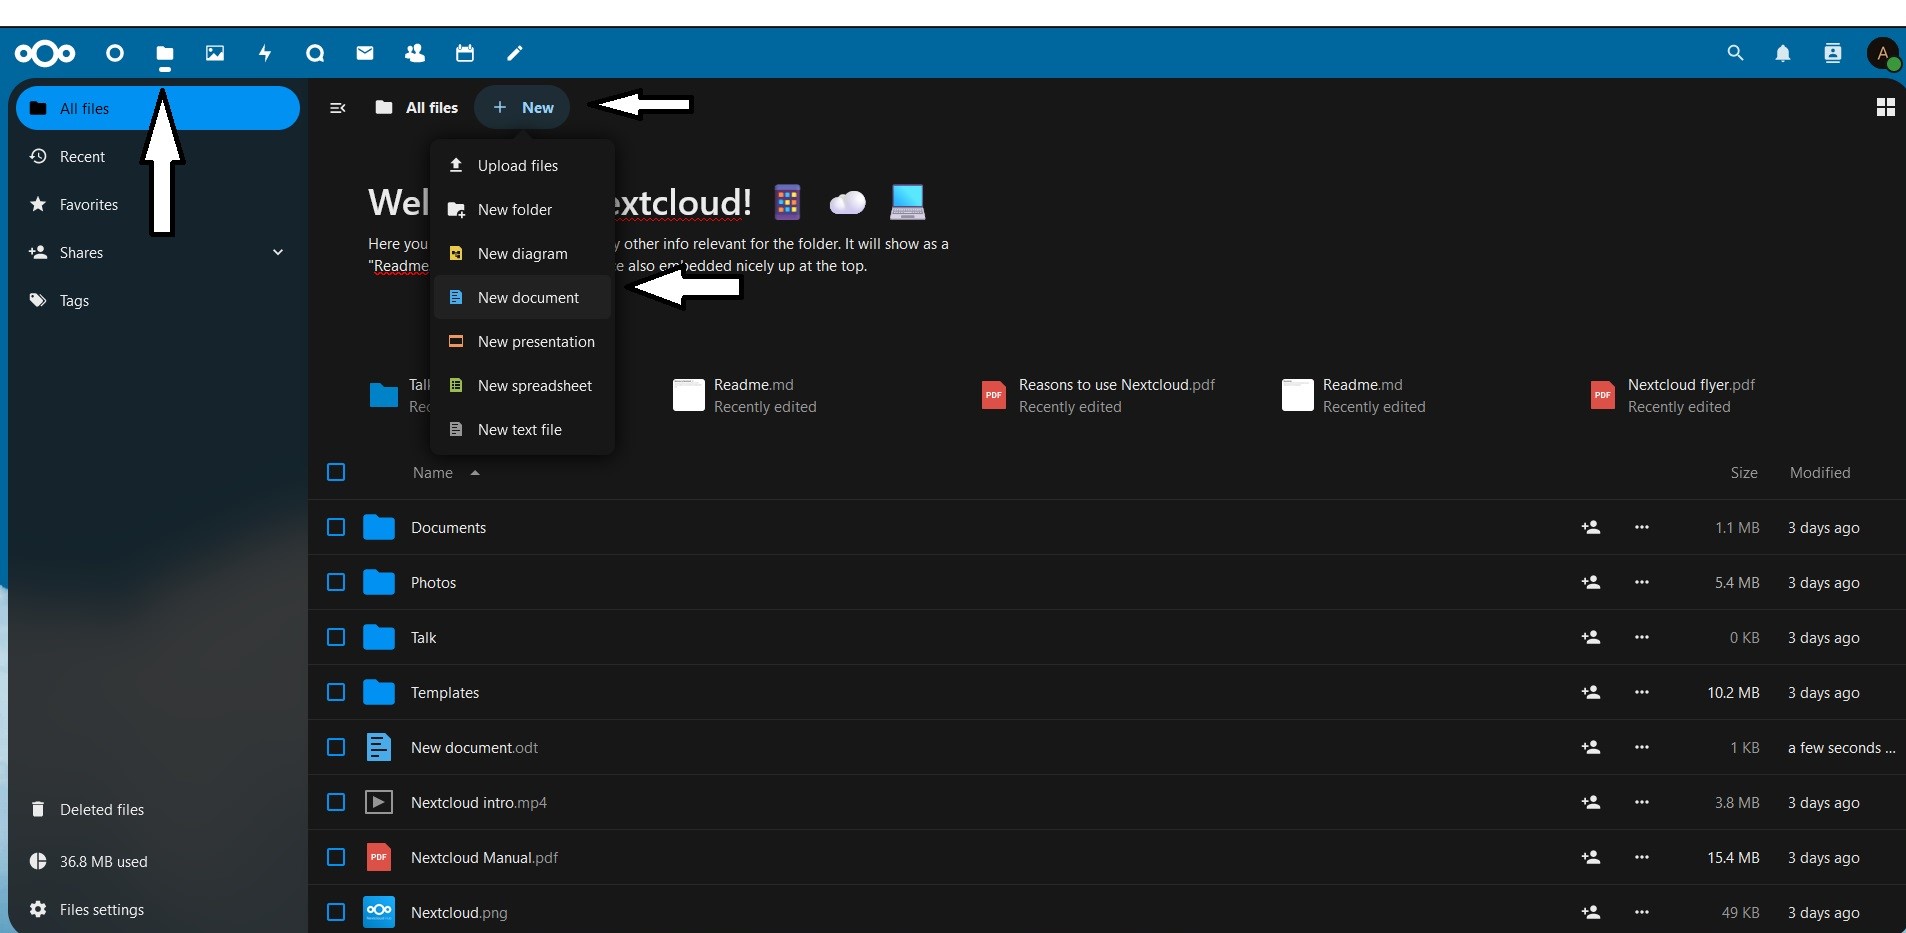
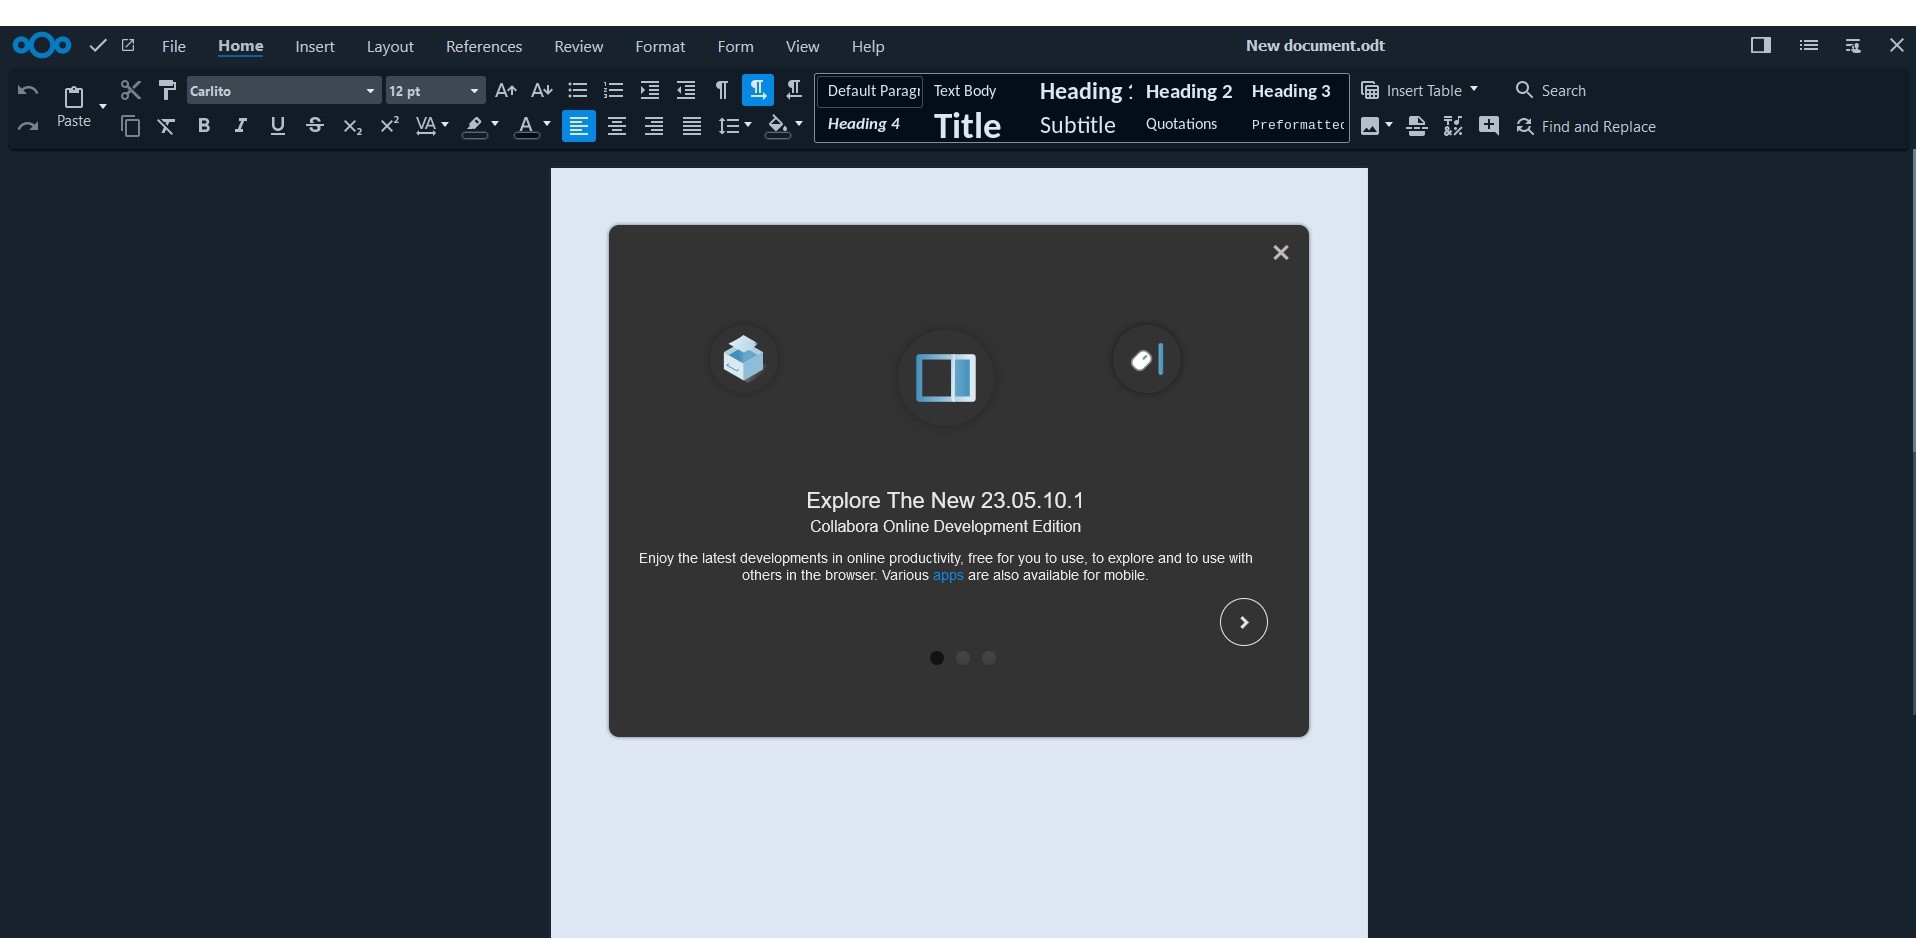
Testing Nextcloud Office
Go to Files and create a new document
Congragulations!! you have installed Nextcloud With Collabora Code!
Nextcloud Installation using Docker Build and Docker Compose
This method includes Redis, MariaDB, and Nextcloud Memories
inotify libraries have been added to the Dockerfile for the iNotify App
Nextcloud 28.0.4 was the latest version when making this tutorial.
First lets update your system.
sudo apt-get update && apt-get upgrade -y
Setting up the directories
Now lets setup the Directories
You can change the directories to your liking.
sudo mkdir /var/docker && sudo mkdir /var/docker/nextcloud
Lets take ownership of the directory
sudo chown -R 1000:1000 /var/docker
Creating .env files
Now lets download and modify Docker Secrets files in the new directory.
wget https://raw.githubusercontent.com/TrueBankai416/BankaiTechDocs/main/Files/Nextcloud/Memories%20and%20Office/.nextcloud.env
wget https://raw.githubusercontent.com/TrueBankai416/BankaiTechDocs/main/Files/Nextcloud/Memories%20and%20Office/.mariadb.env
wget https://raw.githubusercontent.com/TrueBankai416/BankaiTechDocs/main/Files/Nextcloud/Memories%20and%20Office/.go_vod.env
nano .mariadb.env
Update the following
MYSQL_ROOT_PASSWORD=CHANGEME
MYSQL_PASSWORD=CHANGEME
Please Change CHANGEME to a password of your choosing.
Refrain from using Special characters for you MySQL Passwords.
Ex. ‘ ~ ! @ # $ % ^ & * ( ) _ - + = { } [ ] / < > , . ; ? ' : | (space)
Save the new file by pressing CTRL+X
Now lets edit the second file.
nano .nextcloud.env
Update the Following
NEXTCLOUD_TRUSTED_DOMAINS=cloud.<YourDomain>.com
TRUSTED_PROXIES=<IP address of your Reverse Proxy>
OVERWRITECLIURL=https://cloud.<YourDomain>.com
MYSQL_PASSWORD=CHANGEME
Please Change the Domain and Reverse Proxy IP.
Please make sure that the Password is the same as the one you previously set in the last file
Remove all instances of <>
Now lets update the go-vod.env file
nano .go_vod.env
Update the following
NEXTCLOUD_HOST=https://cloud.bankai-tech.com
- Pre-built Image
- Building Custom Image
Downloading the Compose file
wget https://raw.githubusercontent.com/TrueBankai416/BankaiTechDocs/main/Files/Nextcloud/Memories%20and%20Office/docker-compose.yaml
Creating the Custom Image
wget https://raw.githubusercontent.com/TrueBankai416/BankaiTechDocs/main/Files/Nextcloud/Memories%20and%20Office/Dockerfile \
wget https://raw.githubusercontent.com/TrueBankai416/BankaiTechDocs/main/Files/Nextcloud/Memories%20and%20Office/supervisord.conf \
docker build . -t nextcloud:28.0.4-custom
Go grab a beer, this will take awhile.... maybe take a nap.
Change the nextcloud:28.0.4-custom to the latest version of nextcloud\ Ex. nextcloud:29.0.8-custom`
Modifying the Compose file
Now lets edit the compose file.
wget https://raw.githubusercontent.com/TrueBankai416/BankaiTechDocs/main/Files/Nextcloud/Memories%20and%20Office/docker-compose.yaml
nano docker-compose.yaml
Update this line if you named the image differently during the build command.
image: nextcloud:28.0.4-custom
If you want to use GPU for transcoding then uncomment this line
runtime: nvidia # (NVENC) # For Nvidia HW Acceleration, Uncomment after installing nvidia drivers.
Test nvidia by running sudo nvidia-smi
Starting Nextcloud
Now lets start it up.
sudo docker compose up -d
the -d flag stands for detatched mode.
After its done pulling the docker images you can open up a web browser.
Before proceeding, you will need to configure your reverse proxy. I have an example Nginx config Here.
Connect to nextcloud by typing in your configured domain
You should see this screen.
Account Creation
Now create an admin account and click Install
Click Install Recommended Apps
When its done installing you should see your Dashboard
Checking for errors and warnings
On the top right click the User Icon and go to Administration Settings
Here you should see Security & Setup Warnings
In order to fix the Maintenance Window and the Phone Region warnings, we will have to edit our config.php file.
Modifying the config.php file
Run the following command to open the config.php file with nano.
nano nextcloud/config/config.php
If you recieved an error Directory nextcloud doesnt exist, then you need to change directories.
cd /var/docker/nextcloud then try again.Now add the following to the bottom of the file.
  'maintenance_window_start' => 1,
  'default_phone_region' => 'US',
Now if you go back to your Administration Settings Page.
It should look something like this.
In some cases, you may have to delete your browser cache and restart the browser for the Warnings to update.
Creating production use user
Now you can go create a user for yourself.
Go to the user icon on the top right and select Users.
Click on Add User on the left hand side.
Now create your User.
Make sure to set Groups to admin
Installing Nextcloud Memories
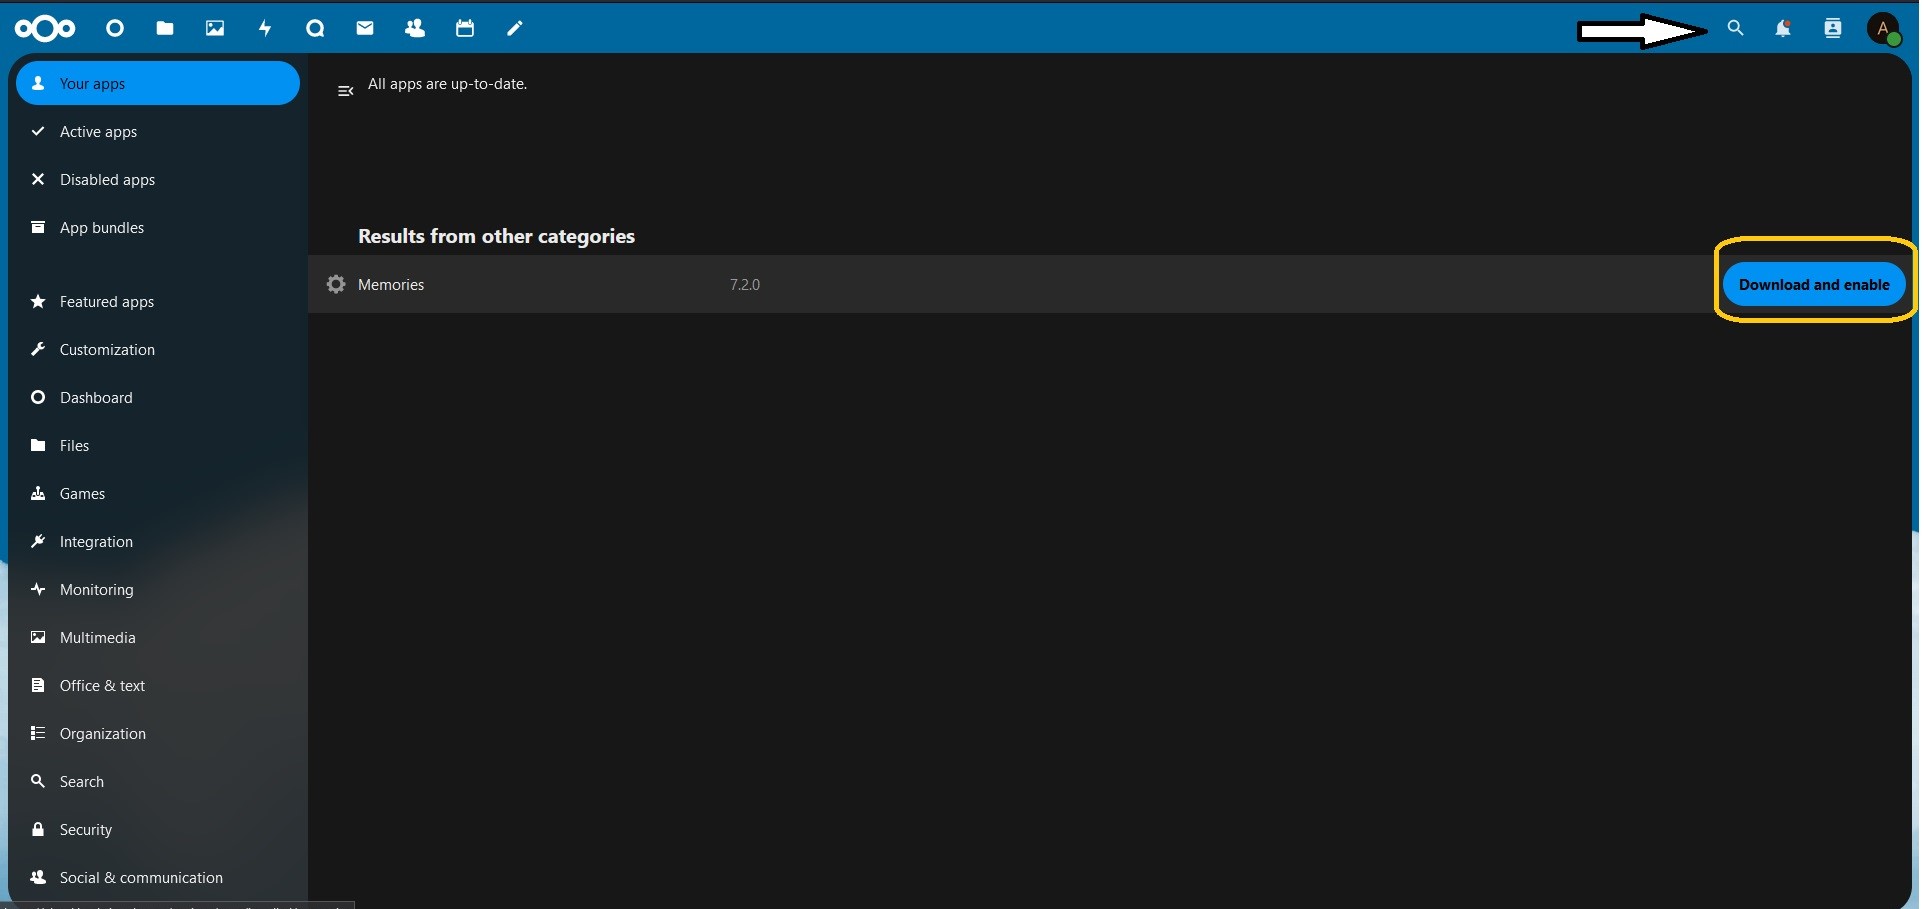
Go to Apps
Now click Download and enable
Now search and install Preview Generator.
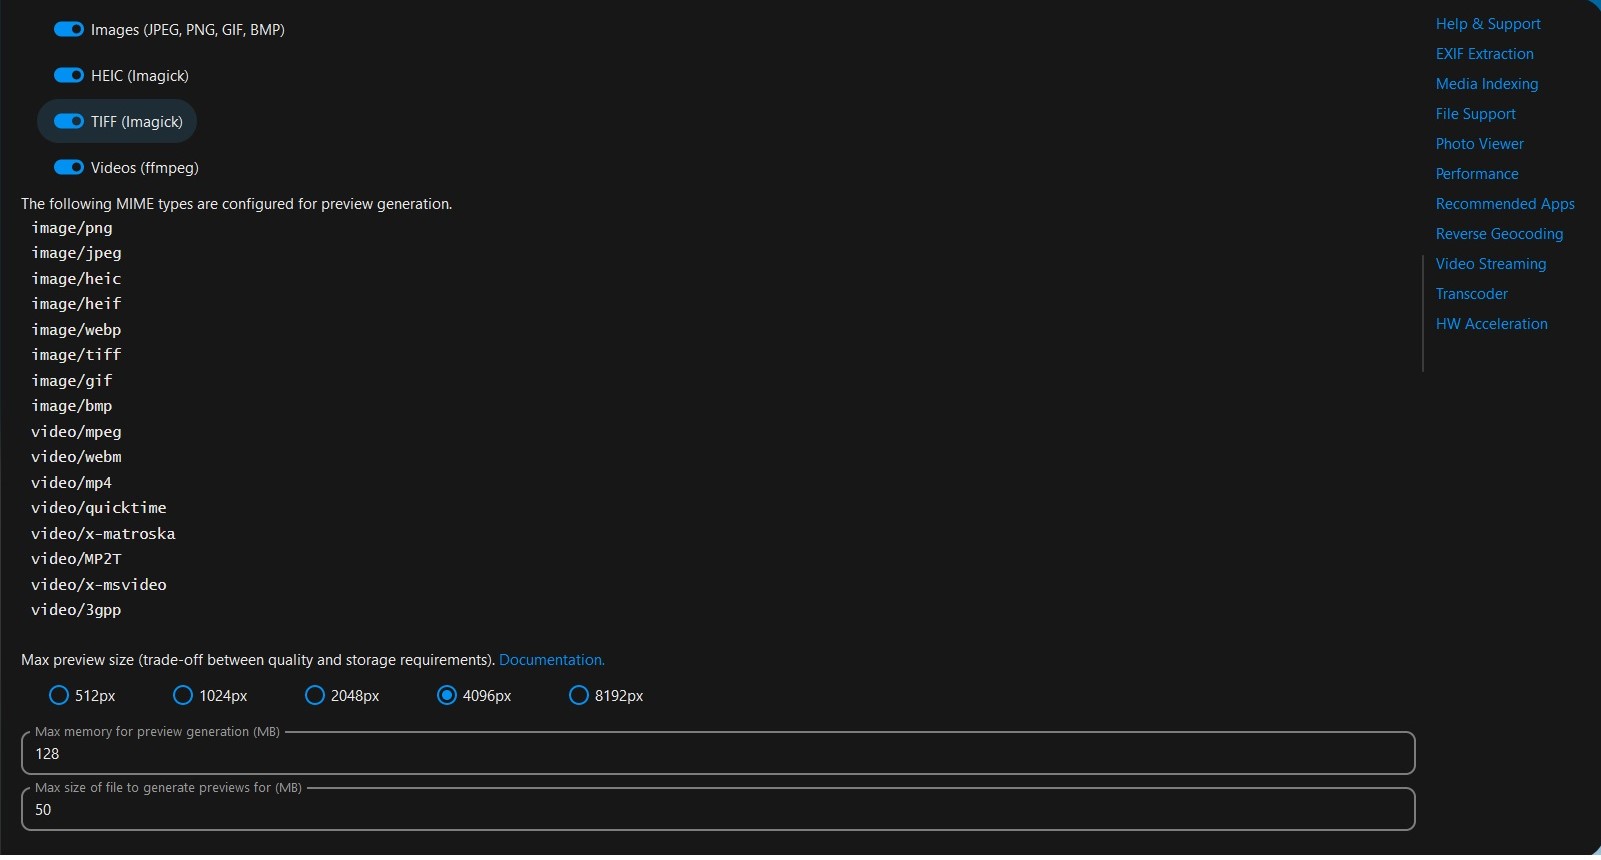
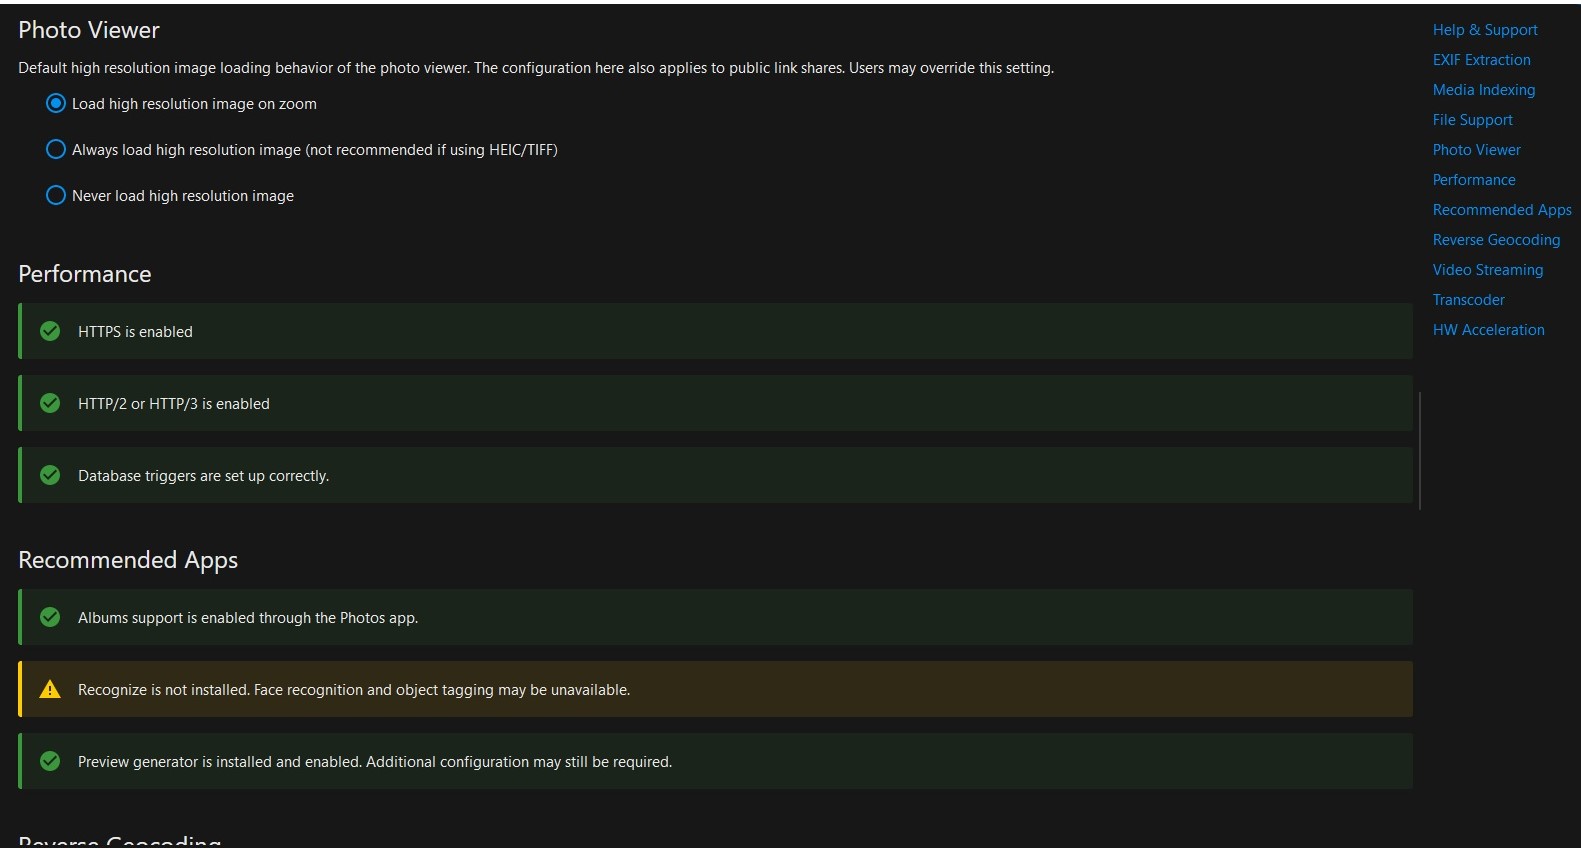
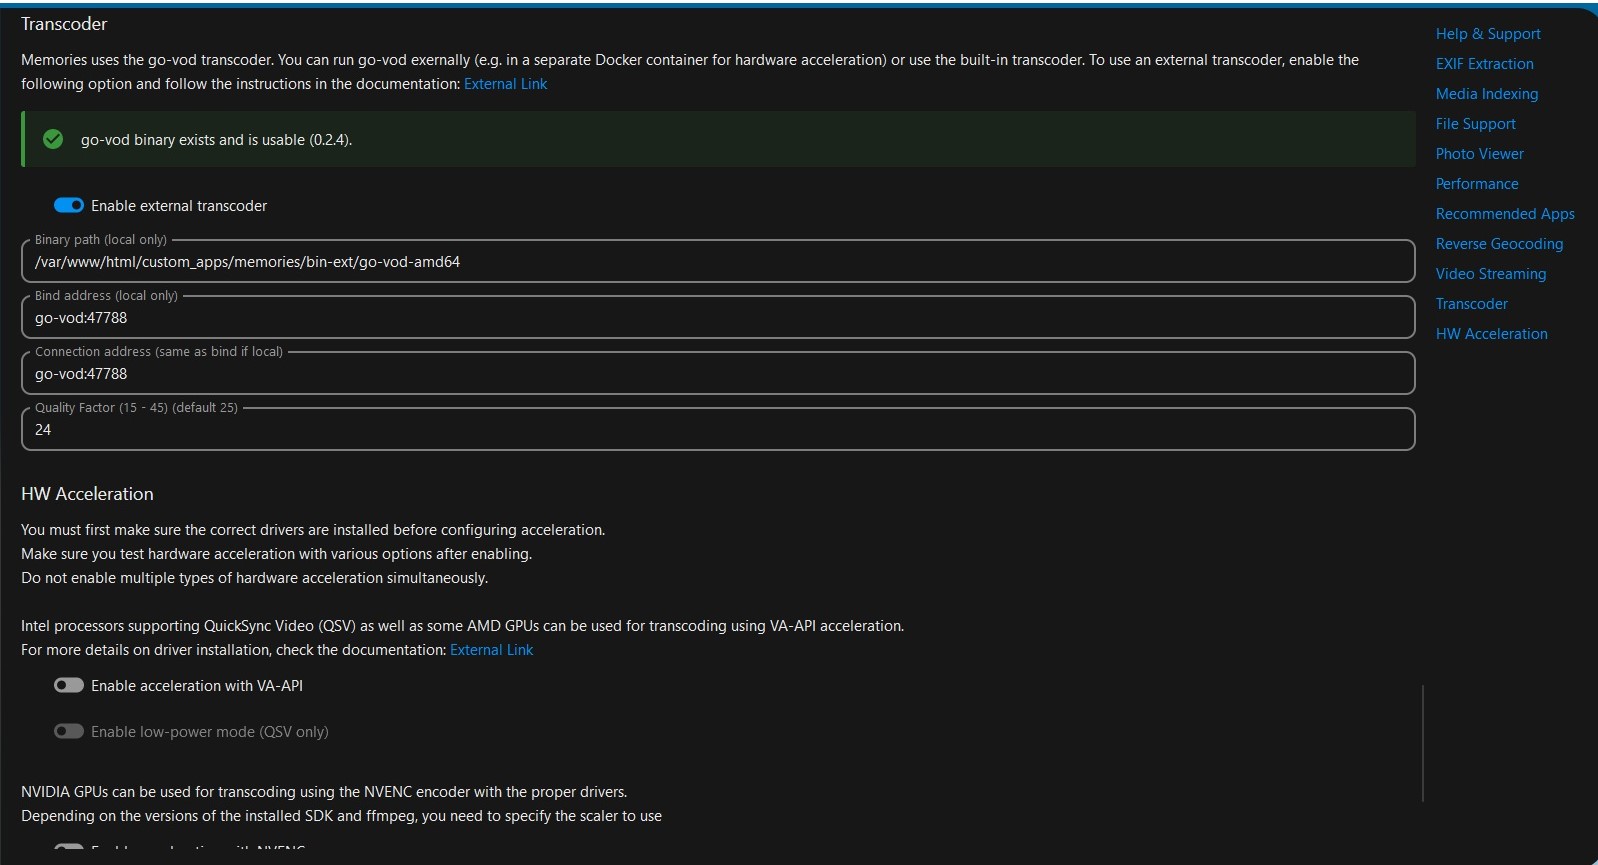
Configuring Nextcloud Memories
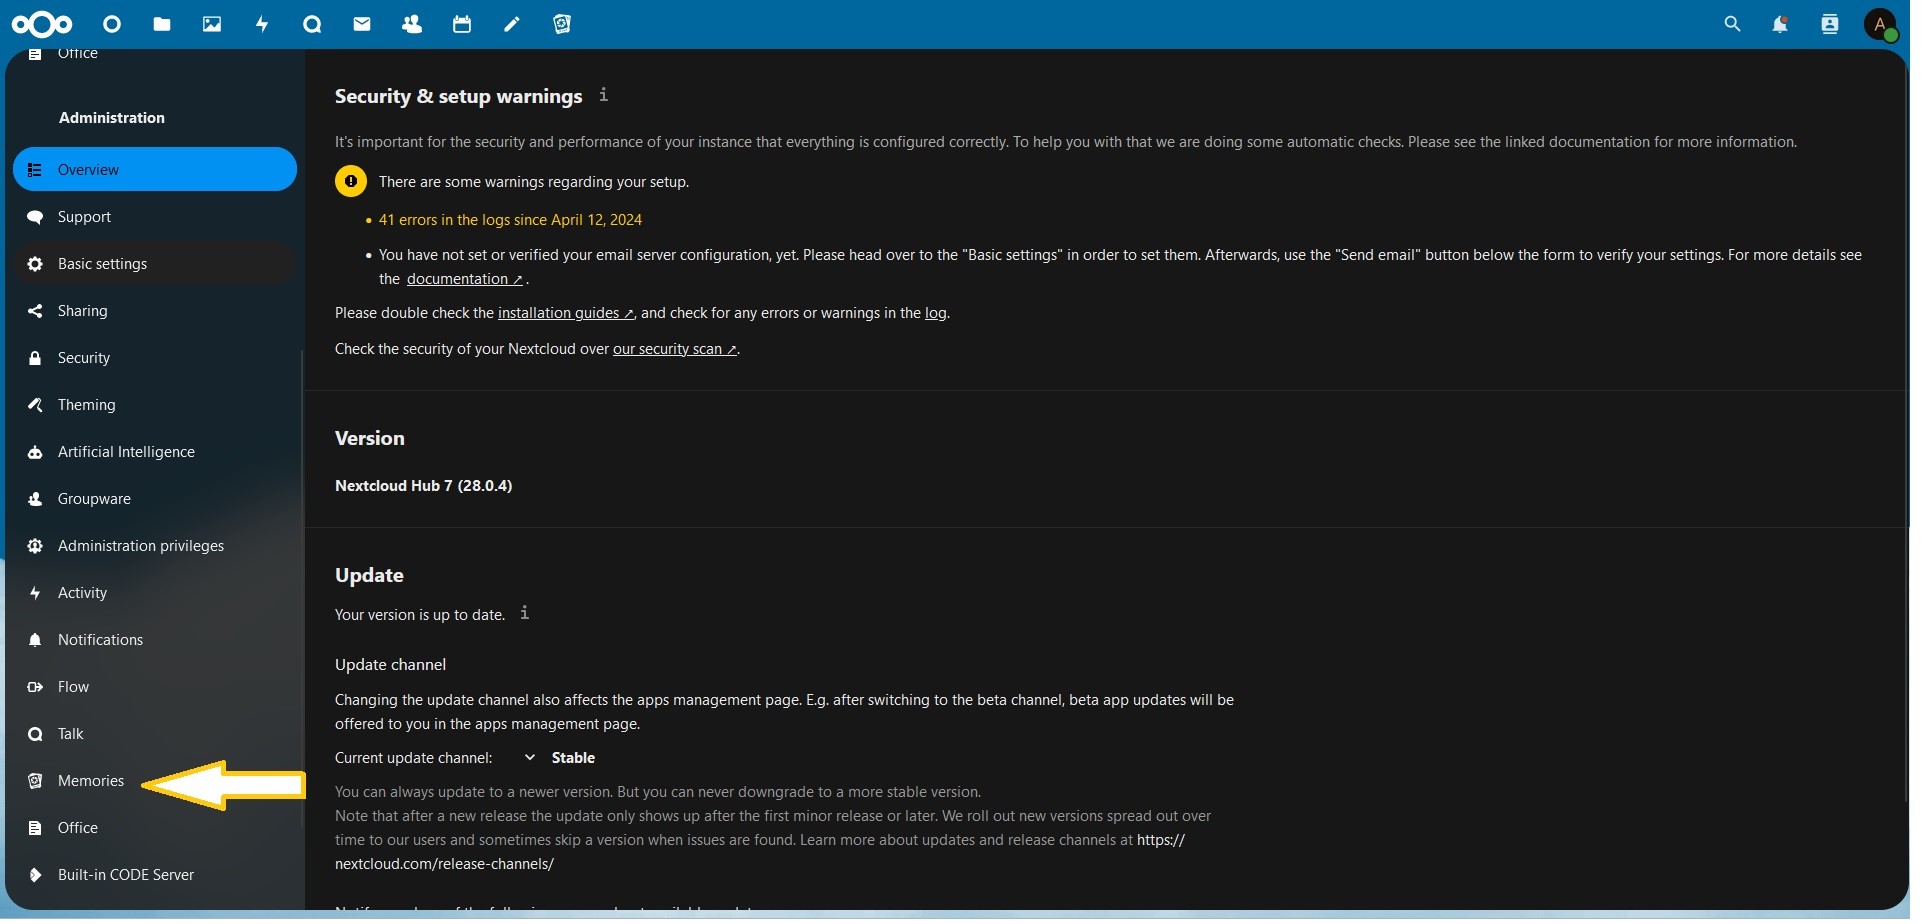
Go to your Administration Settings and find Memories
My Settings are as Follows
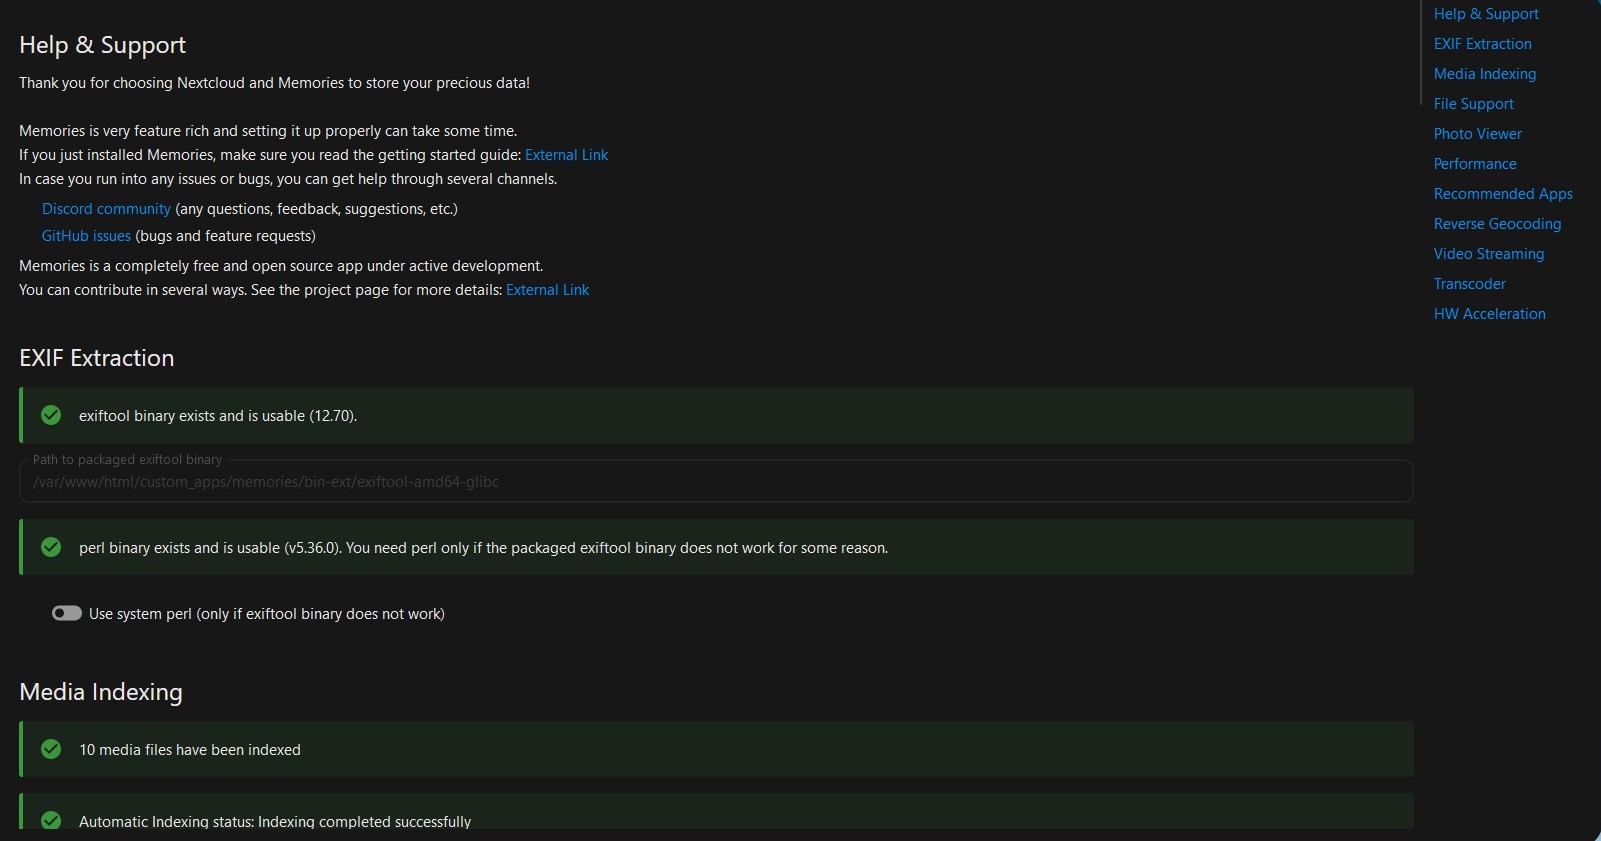
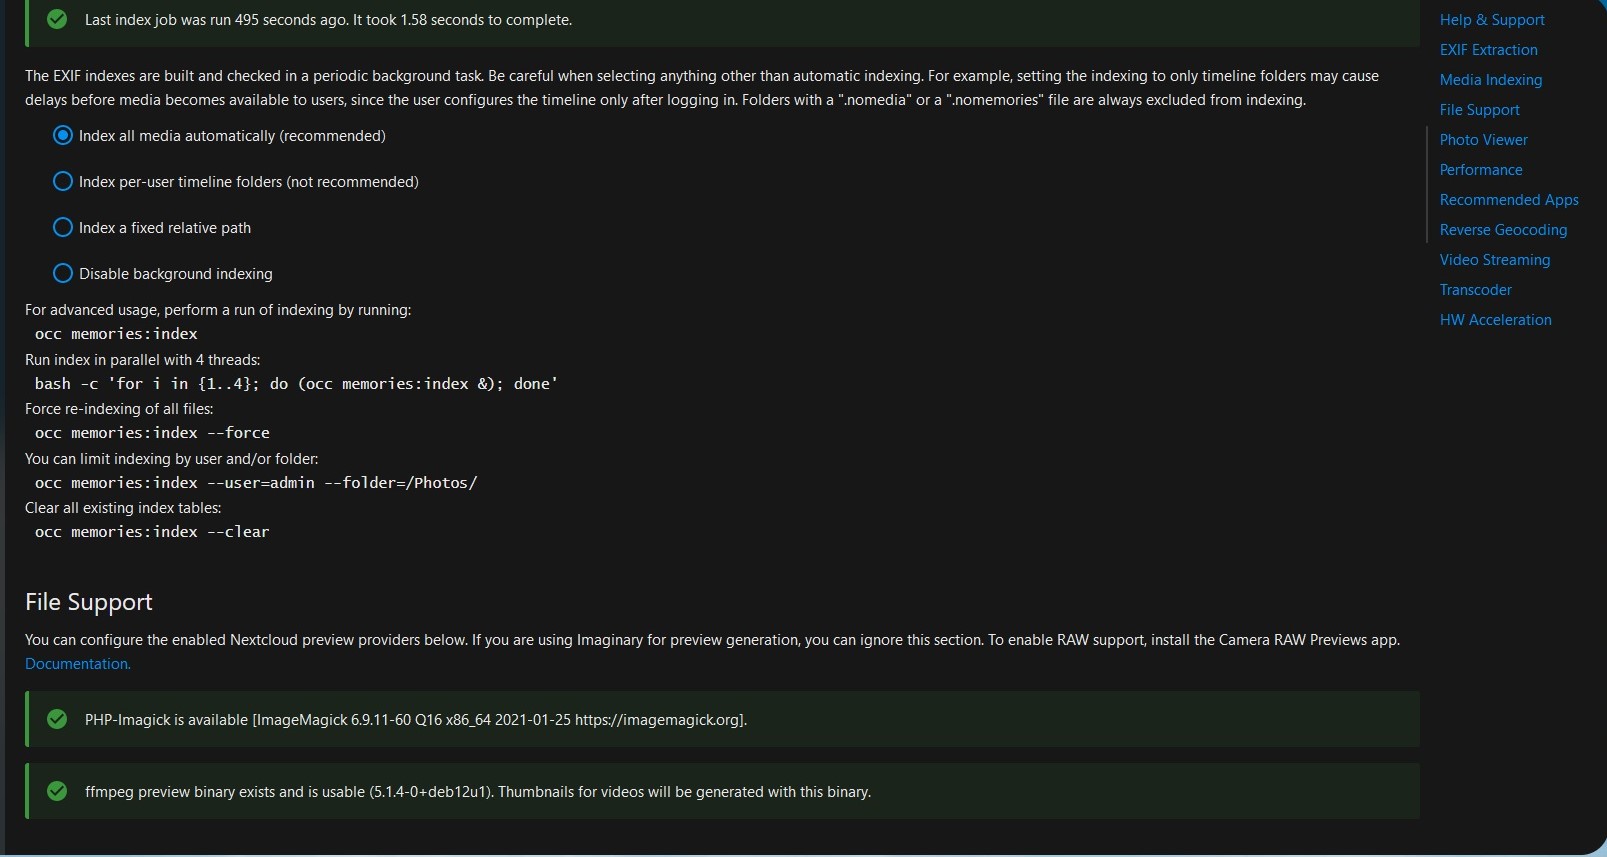

Fixing the warnings
Im sure you noticed that there are a few warnings we need to take care of.
 Geometry table has not been created.
Reverse geocoding has not been configured (-1).
We can generate the Geometry table using this command.
sudo docker exec -it -u 33 nextcloud php occ memories:places-setup
I prefer generating the Geometry table this way so I can view the progress
Congragulations!! you have installed Nextcloud!
Nextcloud Installation using Docker Build and Docker Compose
This method includes Redis, MariaDB, Nextcloud Memories, and Office
inotify libraries have been added to the Dockerfile for the iNotify App
Nextcloud 28.0.4 was the latest version when making this tutorial.
First lets update your system.
sudo apt-get update && apt-get upgrade -y
Setting up the directories
Now lets setup the Directories
You can change the directories to your liking.
sudo mkdir /var/docker && sudo mkdir /var/docker/nextcloud
Lets take ownership of the directory
sudo chown -R 1000:1000 /var/docker
Creating .env files
Now lets download and modify Docker Secrets files in the new directory.
cd /var/docker/nextcloud
wget https://raw.githubusercontent.com/TrueBankai416/BankaiTechDocs/main/Files/Nextcloud/Memories%20and%20Office/.nextcloud.env
wget https://raw.githubusercontent.com/TrueBankai416/BankaiTechDocs/main/Files/Nextcloud/Memories%20and%20Office/.mariadb.env
wget https://raw.githubusercontent.com/TrueBankai416/BankaiTechDocs/main/Files/Nextcloud/Memories%20and%20Office/.collabora.env
wget https://raw.githubusercontent.com/TrueBankai416/BankaiTechDocs/main/Files/Nextcloud/Memories%20and%20Office/.go_vod.env
nano .mariadb.env
Update the following
MYSQL_ROOT_PASSWORD=CHANGEME
MYSQL_PASSWORD=CHANGEME
Please Change CHANGEME to a password of your choosing.
Refrain from using Special characters for you MySQL Passwords.
Ex. ‘ ~ ! @ # $ % ^ & * ( ) _ - + = { } [ ] / < > , . ; ? ' : | (space)
Save the new file by pressing CTRL+X
Now lets edit the second file.
nano .nextcloud.env
Update the Following
NEXTCLOUD_TRUSTED_DOMAINS=cloud.<YourDomain>.com
TRUSTED_PROXIES=<IP address of your Reverse Proxy>
OVERWRITECLIURL=https://cloud.<YourDomain>.com
MYSQL_PASSWORD=CHANGEME
Please Change the Domain and Reverse Proxy IP.
Please make sure that the Password is the same as the one you previously set in the last file
Remove all instances of <>
nano .collabora.env
Update the Following
username=admin
password=2hRZ8zRBn7Kyo7
domain=cloud\\.bankai-tech\\.com
Now lets update the go-vod.env file
nano .go_vod.env
Update the following
NEXTCLOUD_HOST=https://cloud.bankai-tech.com
- Pre-built Image
- Building Custom Image
Downloading the Compose file
wget https://raw.githubusercontent.com/TrueBankai416/BankaiTechDocs/main/Files/Nextcloud/Memories%20and%20Office/docker-compose.yaml
Creating the Custom Image
wget https://raw.githubusercontent.com/TrueBankai416/BankaiTechDocs/main/Files/Nextcloud/Memories%20and%20Office/Dockerfile \
wget https://raw.githubusercontent.com/TrueBankai416/BankaiTechDocs/main/Files/Nextcloud/Memories%20and%20Office/supervisord.conf \
docker build . -t nextcloud:28.0.4-custom
Go grab a beer, this will take awhile.... maybe take a nap.
Change the nextcloud:28.0.4-custom to the latest version of nextcloud\ Ex. nextcloud:29.0.8-custom`
Modifying the Compose file
Now lets edit the compose file.
wget https://raw.githubusercontent.com/TrueBankai416/BankaiTechDocs/main/Files/Nextcloud/Memories%20and%20Office/docker-compose.yaml
nano docker-compose.yaml
Update this line if you named the image differently during the build command.
image: nextcloud:28.0.4-custom
If you want to use GPU for transcoding then uncomment this line
runtime: nvidia # (NVENC) # For Nvidia HW Acceleration, Uncomment after installing nvidia drivers.
Test nvidia by running sudo nvidia-smi
Starting Nextcloud
Now lets start it up.
sudo docker compose up -d
the -d flag stands for detatched mode.
After its done pulling the docker images you can open up a web browser.
Before proceeding, you will need to configure your reverse proxy. I have an example Nginx config Here.
Connect to nextcloud by typing in your configured domain
You should see this screen.
Account Creation
Now create an admin account and click Install
Click Install Recommended Apps
When its done installing you should see your Dashboard
Checking for errors and warnings
On the top right click the User Icon and go to Administration Settings
Here you should see Security & Setup Warnings
In order to fix the Maintenance Window and the Phone Region warnings, we will have to edit our config.php file.
Modifying the config.php file
Run the following command to open the config.php file with nano.
nano nextcloud/config/config.php
If you recieved an error Directory nextcloud doesnt exist, then you need to change directories.
cd /var/docker/nextcloud then try again.Now add the following to the bottom of the file.
  'maintenance_window_start' => 1,
  'default_phone_region' => 'US',
Now if you go back to your Administration Settings Page.
It should look something like this.
In some cases, you may have to delete your browser cache and restart the browser for the Warnings to update.
Creating production use user
Now you can go create a user for yourself.
Go to the user icon on the top right and select Users.
Click on Add User on the left hand side.
Now create your User.
Make sure to set Groups to admin
Setting up Nextcloud Office (Collabora Code)
Head back over to your Administration Settings and scroll down on the left until you see Nextcloud Office
Wait a few seconds while it processes.
Now choose Use your own Server
Enter in your domain that you will use for office and Uncheck Disable certificate verification
You will have to add an A record for office and setup your reverse proxy for Collabra
WOPI List
Now scroll down to the WOPI List
Public IP, Network CIDR, and 127.0.0.1Ex. 251.163.184.3,192.168.1.1/24,1270.0.1
Press ENTER
Testing Nextcloud Office
Go to Files and create a new document
Installing Nextcloud Memories
Go to Apps
Now click Download and enable
Now search and install Preview Generator.
Configuring Nextcloud Memories
Go to your Administration Settings and find Memories
My Settings are as Follows
Fixing the warnings
Im sure you noticed that there are a few warnings we need to take care of.
 Geometry table has not been created.
Reverse geocoding has not been configured (-1).
We can generate the Geometry table using this command.
sudo docker exec -it -u 33 nextcloud php occ memories:places-setup
I prefer generating the Geometry table this way so I can view the progress
Congragulations!! you have installed Nextcloud!
Troubleshooting
For troubleshooting, please visit Troublshooting.
Comment at the bottom of this page if you need help or have any suggestions to improve this site